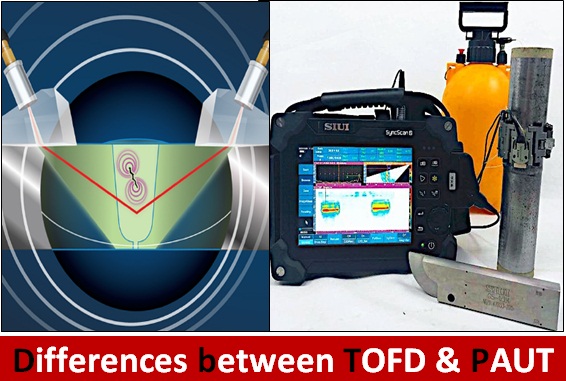
What are the differences between TOFD and PAUT?
Both PAUT (Phased Array Ultrasonic Testing) and TOFD (Time of Flight Diffraction) are forms of ultrasonic testing (UT) that are used by NDT inspection services to evaluate assets for flaws and defects. Like PAUT, TOFD uses sound waves to detect flaws by measuring the time that it takes for the sound wave to be emitted and returned. However, the difference between PAUT and TOFD is that TOFD measures both high and low amplitude waves. That is, PAUT records only high amplitude waves that are returning from the back of the asset, while TOFD records both high amplitude waves and low amplitude waves that deflect off of the tips of flaws and defects.
style="display:block; text-align:center;"
data-ad-layout="in-article"
data-ad-format="fluid"
data-ad-client="ca-pub-8199620958015516"
data-ad-slot="5640203594">
PAUT is an advanced method of ultrasonic testing. Instead of a single element and beam, phased array uses multiple ultrasonic elements and electronic time delays to create beams by constructive and destructive interference. PAUT offers significant technical advantages for weld testing over conventional ultrasonic as the phased array beams can be steered, scanned, swept and focused electronically from a fixed probe position. Beam steering permits the selected beam angles to be optimized ultrasonically by orienting or focusing them perpendicular to the predicted discontinuities.
PAUT is now used for inspecting fabricated piping and pressure vessel welds. The flaw image obtained with multiple angles and beams give a more accurate flaw characterization than conventional ultrasonic inspection. PAUT can be done in semi-automated or a fully automated mode.
For corrosion mapping application a linear array probe mounted on a wheel is used. Results are immediate, can be viewed as well as emailed for further analysis.
crossorigin="anonymous">
style="display:block; text-align:center;"
data-ad-layout="in-article"
data-ad-format="fluid"
data-ad-client="ca-pub-8199620958015516"
data-ad-slot="5640203594">
TOFD method of ultrasonic testing is a sensitive and accurate method for the non-destructive testing of welds for defects. The use of TOFD enabled crack sizes to be measured more accurately, so that expensive components could be kept in operation as long as possible with minimal risk of failure.
Measuring the amplitude of reflected signal is a relatively unreliable method of sizing defects because the amplitude strongly depends on the orientation of the crack. Instead of amplitude, TOFD uses the time of flight of an ultrasonic pulse to determine the position of a reflector.
Applications:
- Shell to Dish End Joints
- Circular Seam & Long Seam Welds, Joints, T-Joints
- Category D Joints / Pressure Part, Weld-o-lets, etc.
- Structural Welds, Knuckle joint, etc.
- SS & AS Cladded plate Joints
- Boiler Weld Joints (Dia. 1.5” – 4”)
style="display:block; text-align:center;"
data-ad-layout="in-article"
data-ad-format="fluid"
data-ad-client="ca-pub-8199620958015516"
data-ad-slot="5640203594">
Advantages Of PAUT:
- High-speed inspection using single-axis scans instead of conventional raster scan
- Near-optimal focal length and focal spot for various areas of complex parts or thick components
- Small, simple probe assembly with multiple beams from a single probe
- Easy-to-install, one-axis scanning systems
- Better detection in austenitic materials and dissimilar metal (DM) welds
- Alternative to Radiographic imaging
Advantages Of TOFD:
crossorigin="anonymous">style="display:block; text-align:center;"
data-ad-layout="in-article"
data-ad-format="fluid"
data-ad-client="ca-pub-8199620958015516"
data-ad-slot="5640203594">
- Full record of examined weld sections in A-Scan, B-Scan, C-Scan, D-Scan and TOFD Scan presentation. Storage of full examination results
- Real Time vision on quality of welds by the operator during examination
- Accuracy in sizing the through thickness dimensions
- High sensitivity in detecting planar, vertical or oriented defects like cracks or lack of fusion not visible by radiography and hardly to detect by standard ultrasonic pulse echo technique. For these reasons ASME Code with the Code Case 2235 has permitted to perform on pressure vessel welds TOFD examination in lieu of radiography
- Full control on contact effectiveness and coverage by examining the TOFD map in any time after the examination
- Supervision of the examination in the dynamic way as during the scanning on your PC in the office or far away the job


![Saudi Aracmo GI 7.028 (SA-9466) Mobile Crane Operator Daily Inspection Checklist -2022 [PDF]](https://blogger.googleusercontent.com/img/b/R29vZ2xl/AVvXsEjjqlj8kIuErWV-fogjqZWkEjkXJW1cUjZgxYuYDzZrePGV1IR53ShWP2cfij4S5DbquaoCZmVrI4HXLPS3J1D0Uo3KQ8EcOKJGNLJ0jt4jQQm7WBQY9EMjTEmmqpHaU2_U7cKrJOJgMOInJiMy-MHQOqO6AuqEsJXy3e4nxenuKKf57H8mwyz3kUXgafU/s72-c/dsdsdsdsds_001-qcskills-7.028.jpg)

No comments:
Post a Comment